Solving your first Reverse Engineering Challenge
What is Reverse Engineering? #
In simple words Reverse Engineering is the Process of taking compiled machine code and retrieving it’s code into readable form. The main goal of reverse engineering is to understand how the program is working.
For further reference -
Reverse engineering - Wikipedia
What is ELF (Executable and Linkable Format)? #
The header file
An executable file using the ELF file format consists of an ELF header, followed by a program header table or a section header table, or both. The ELF header is always at offset zero of the file. The program header table and the section header table’s offset in the file are defined in the ELF header. The two tables describe the rest of the particularities of the file. This header file describes the above mentioned headers as C structures and also includes structures for dynamic sections, relocation sections and symbol tables.
Ref -
The x86 Assembly Overview #
Assembly is the most popular low level language. The program written in high level language, for example- C The code is compiled into machine code that the CPU can understand.
The Stack #
A is an abstract data structure which consists of information in a Last In First Out system. You put arbitrary objects onto the stack and then you take them off again, much like an in/out tray, the top item is always the one that is taken off and you always put on to the top.
A programs stack isn’t generally hardware (though it’s kept in memory so it can be argued as such), but the Stack Pointer which points to a current area of the Stack is generally a CPU register. This makes it a bit more flexible than a LIFO (Last in First Out) stack as you can change the point at which the stack is addressing.
For example -
PUSH BL / push BL onto the stack and subtract one from the stack pointer.
POP BL / Add one to the stack pointer and POP BL from the stack.
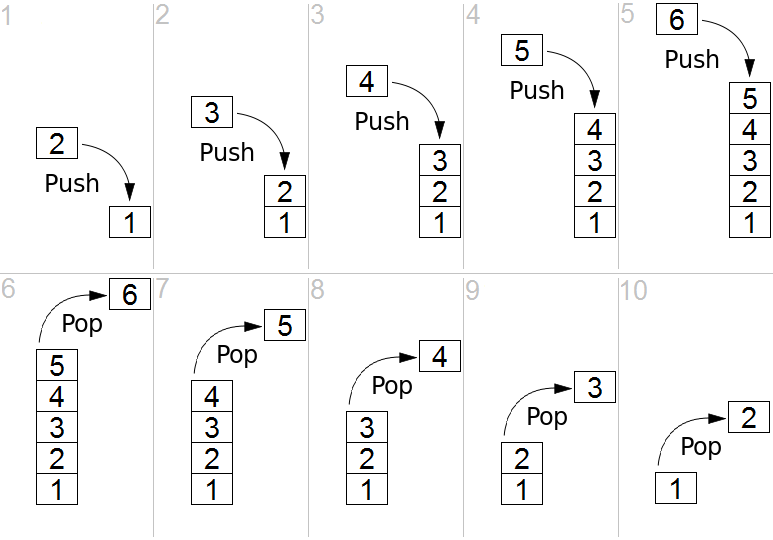
This image makes it easier to understand the Stack last in first out functionality with assembly instructions.
The Registers in x86 Architectures #
The register is a small bit of memory inside the CPU used to store and transfer the data and instructions that are being used by the CPU.
- General x86 Resisters - EAX, EBX, ECX, EDX
- Index and Pointers - ESI, EDI, EBP, EIP, ESP
- Indicator - EFLAGS
Instructions in Assembly #
- “MOV“: move data from one operand into another
- “ADD/SUB/MUL/DIV“: Add, Subtract, Multiply, Divide one operand with another and store the result in a register
- “AND/OR/XOR/NOT/NEG“: Perform logical and/or/xor/not/negate operations on the operand
- “SHL/SHR“: Shift Left/Shift Right the bits in the operand
- “CMP/TEST“: Compare one register with an operand
- “JMP/JZ/JNZ/JB/JS/etc.”: Jump to another instruction (Jump unconditionally, Jump if Zero, Jump if Not Zero, Jump if Below, Jump if Sign, etc.)
- “PUSH/POP“: Push an operand into the stack, or pop a value from the stack into a register
- “CALL“: Call a function. This is the equivalent of doing a “PUSH %EIP+4” + “JMP”. I’ll get into calling conventions later..
- “RET“: Return from a function. This is the equivalent of doing a “POP %EIP”
Debugger - GDB #
To learn GDB (GNU Project Debugger) we will run simple hello_world program binary.
The C hello_world Program -
##include <stdio.h>
int main() {
printf("Hello World!");
return 0;
}
Compiling C program to obtain Executable
gcc <example.c> -o <output filename>
→
gcc hello_world.c -o hello_world
Running the Binary with GDB #
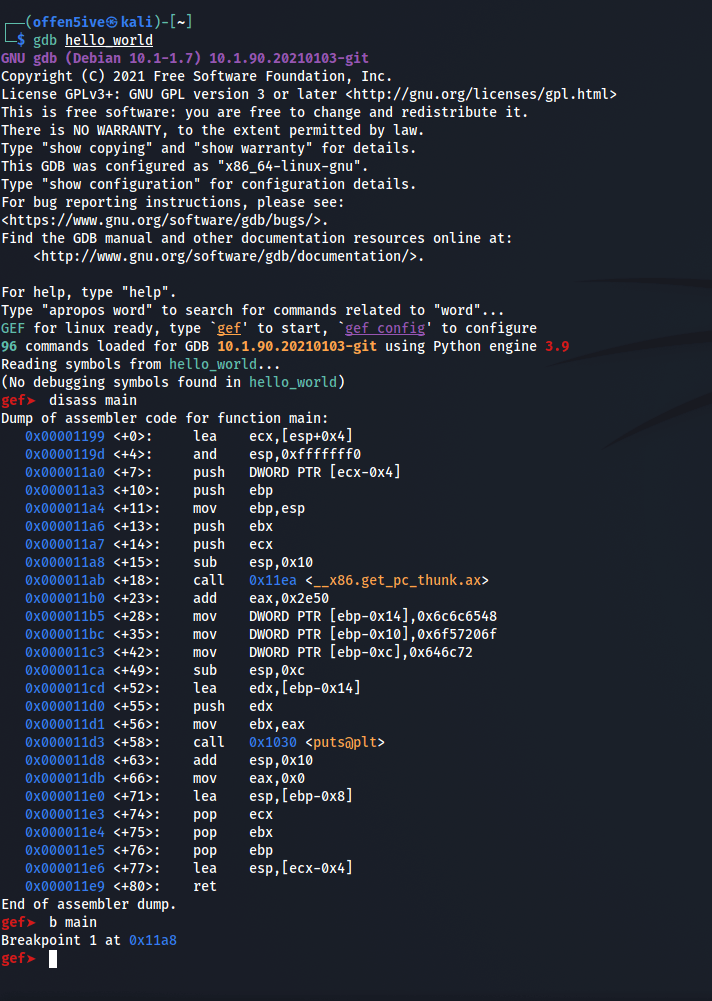
Setting Breakpoints #
Breakpoints are set to the program for GDB to stop execution and examine the contents of the stack.
For example setting breakpoints to the main function would be
break main
or
b main
or you can use address of the function to set break point.

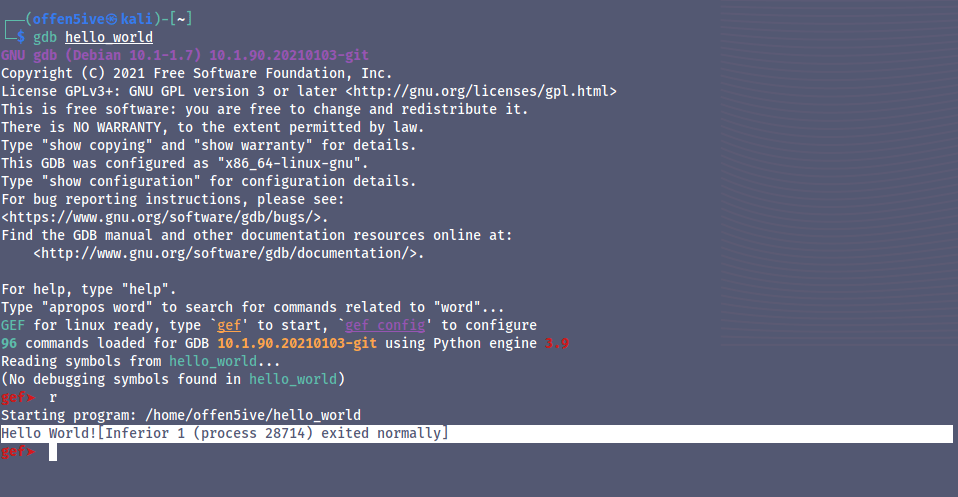
Here we have put the breakpoints to the main function now to enter debugging mode we can run the program with ‘r’.

after running the program we are in the debugging mode.
To check all the breakpoints we can use use,
info breakpoints
or ‘info b’ or ‘i b’

we can see the break point we just set to the main functions.
we can delete the breakpoints with
del and the num of the break point that is 1 in the image above so

Analyzing the Binary #
So we will take simple hello world C program binary.
##include<stdio.h>
int main()
{
char string[] = "Hello World";
puts(string);
return 0;
}
Running Binary with GDB and setting breakpoints to the main function.
To enter Debugging mode press r to run and press enter
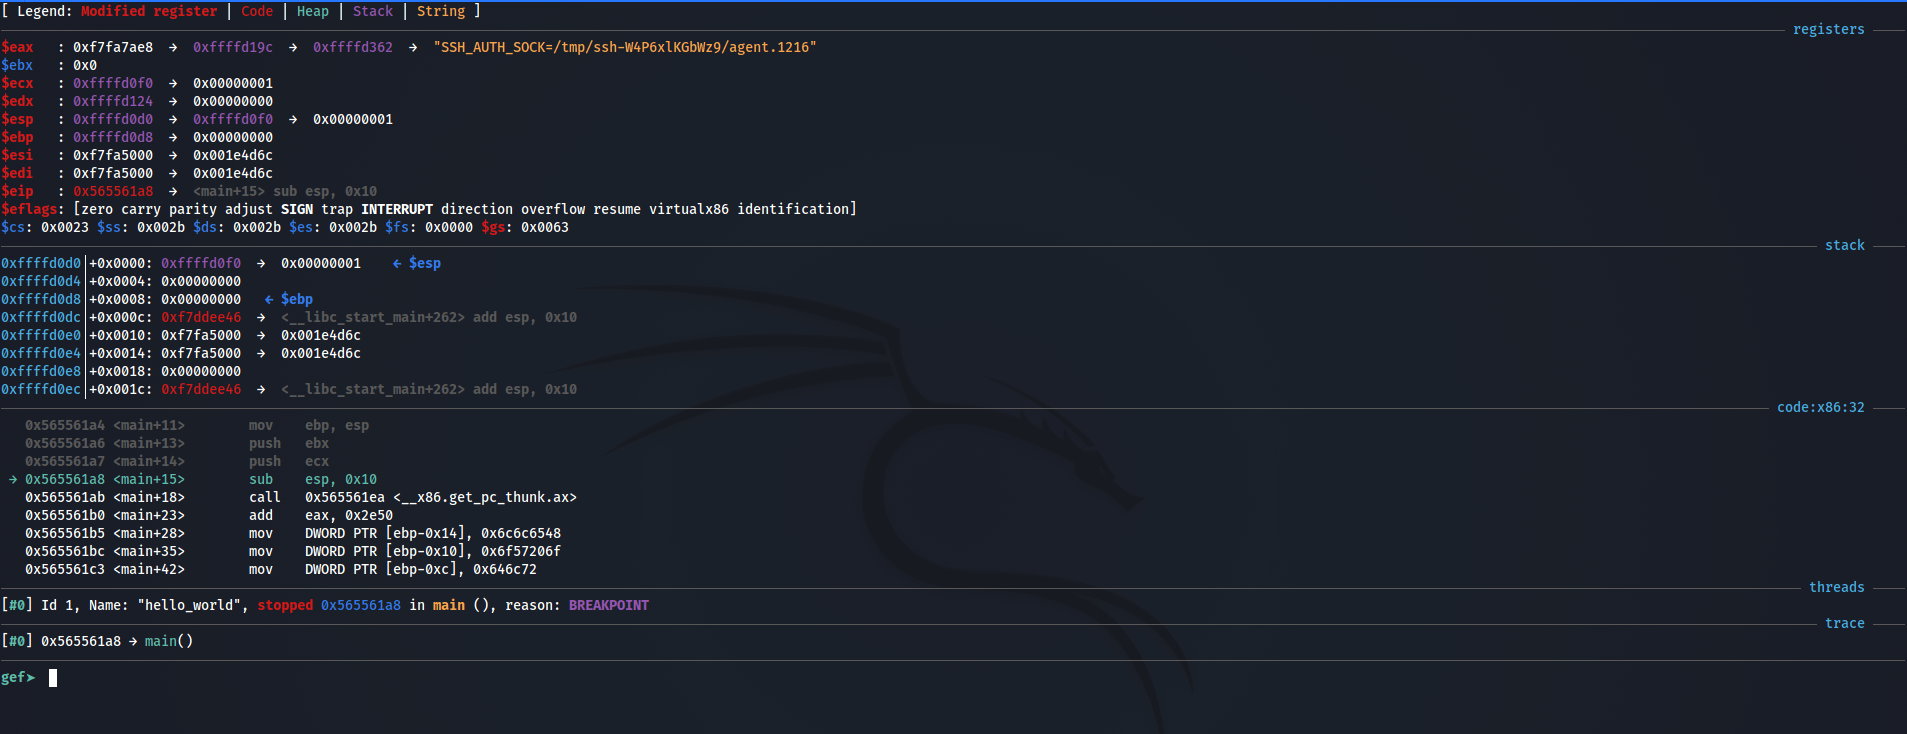
As we can see ESP register holds the value 0xffffd0c4
now let’s examine pointer.
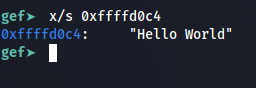
So we can see that it points to the Hello World….
Introduction to Decompiler : Ghidra #
Ghidra is a free and open source reverse engineering tool developed by the National Security Agency of the United States. The binaries were released at RSA Conference in March 2019; the sources were published one month later on GitHub. Ghidra is seen by many security researchers as a competitor to IDA Pro.
ref - https://en.wikipedia.org/wiki/Ghidra
We will take the same hello world program binary and decompile the binary to obtain C program which will be somehow like the binary we compiled.
So open Up ghidra and Create new project and give it a name.
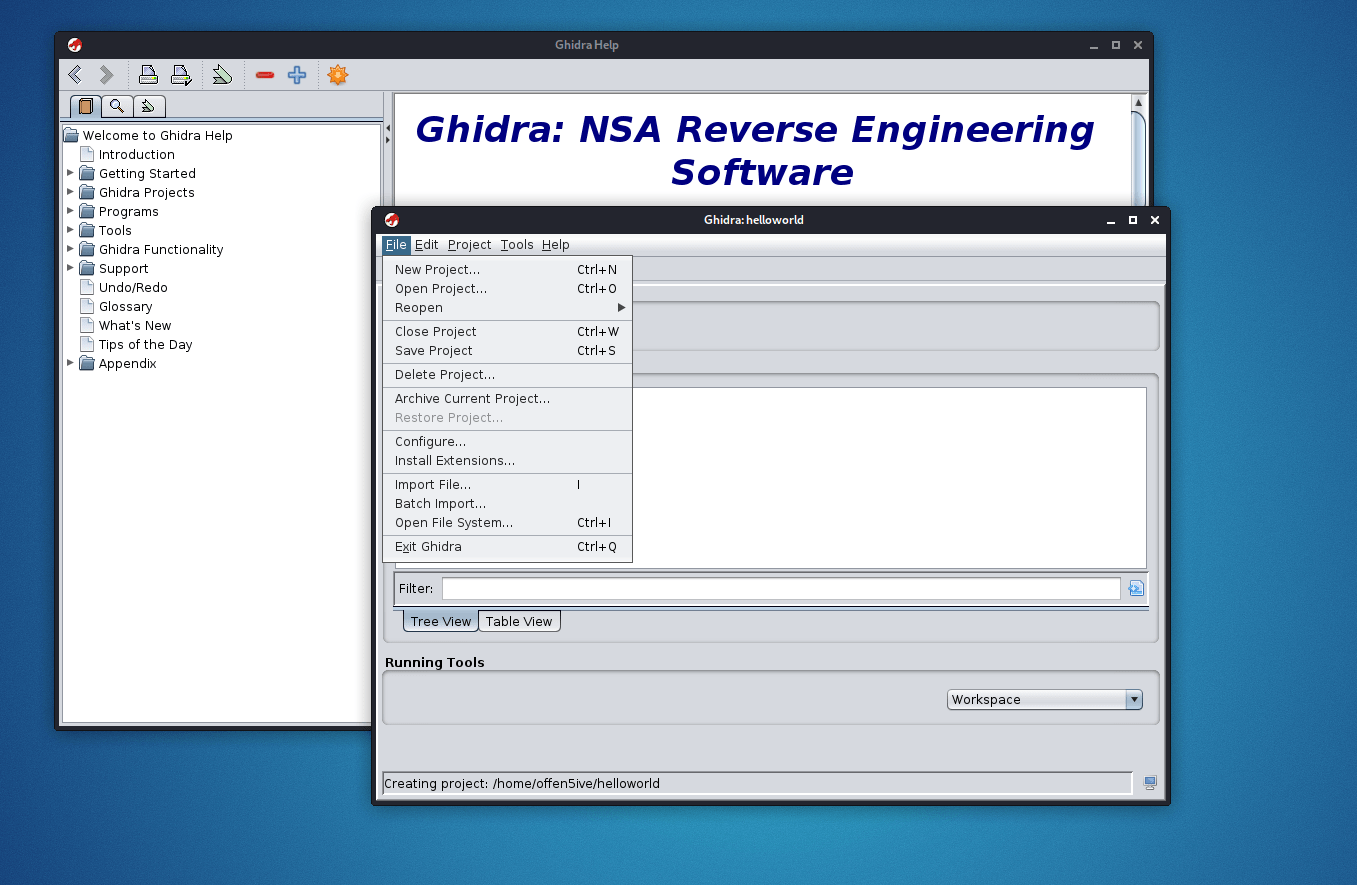
Now under Tool Chest you could see a dragon click on it and your project that you just created will can be seen under Active Projects.
Now click on file tab and open and select the Binary or drag and drop the binary any where on ghidra.
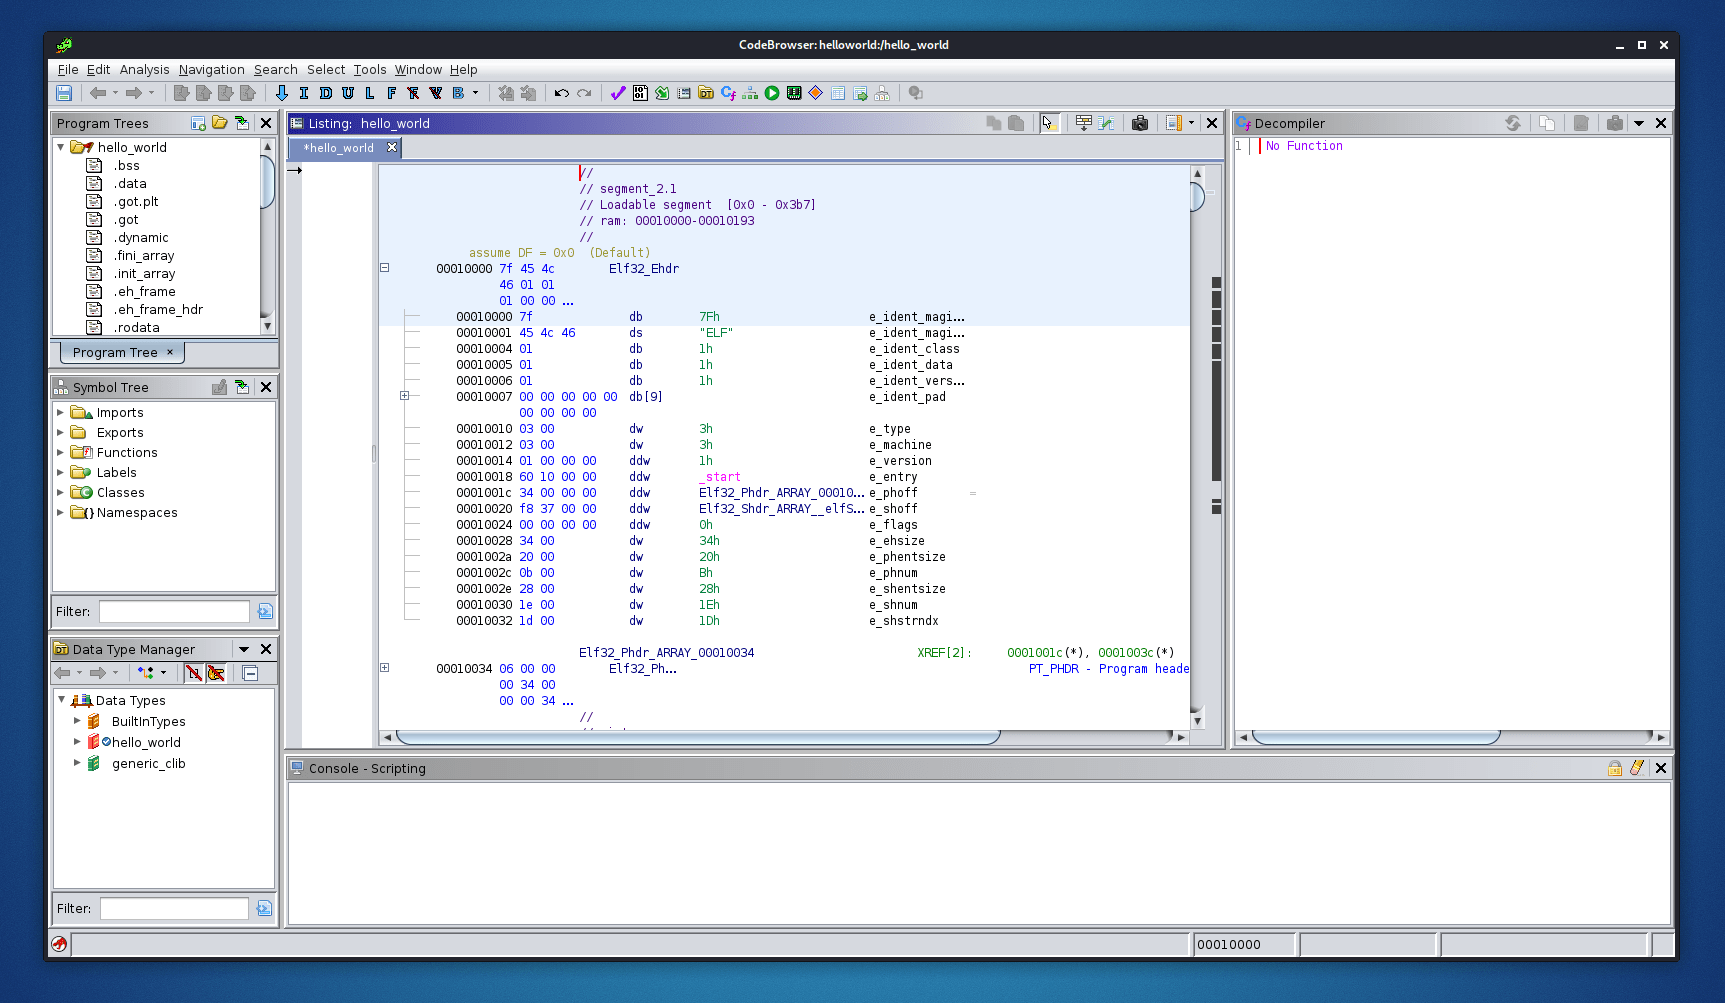
Click on Functions to expand it and all the functions used in the program can be seen.
Click on any function suppose main function once you click on it you’ll see the decompiled program on the right most window.
Practical Reverse Engineering #
So, I’ll be solving a challenge from crackmes.one
So we will start with gathering some information about the binary.

now with this we know that this is 64bit ELF executable and it’s a non-stripped binary.
now let’s run this with GDB.
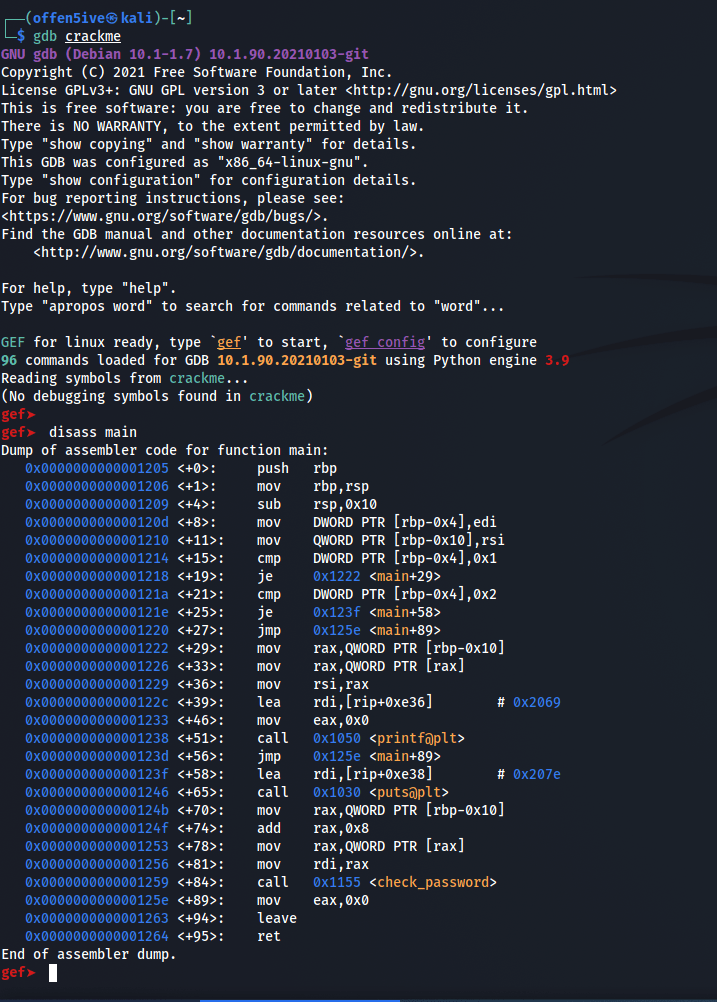
Disassembling the main function we can see the assembly of the binary.
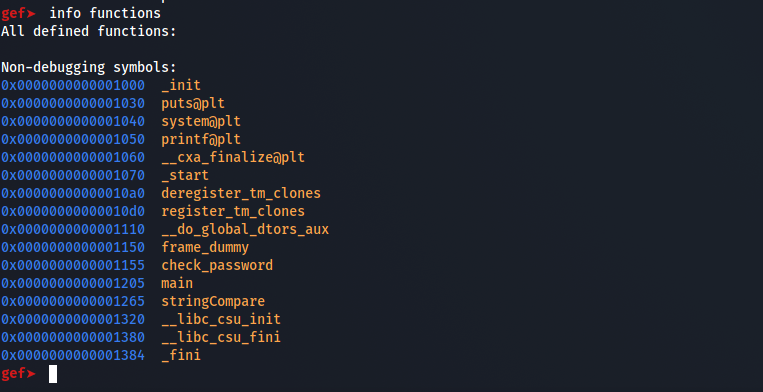
with info functions we can see all the functions used in the program and here as we can see the “check_password” function seems interesting so let’s set a break point to the function and see whats happening.
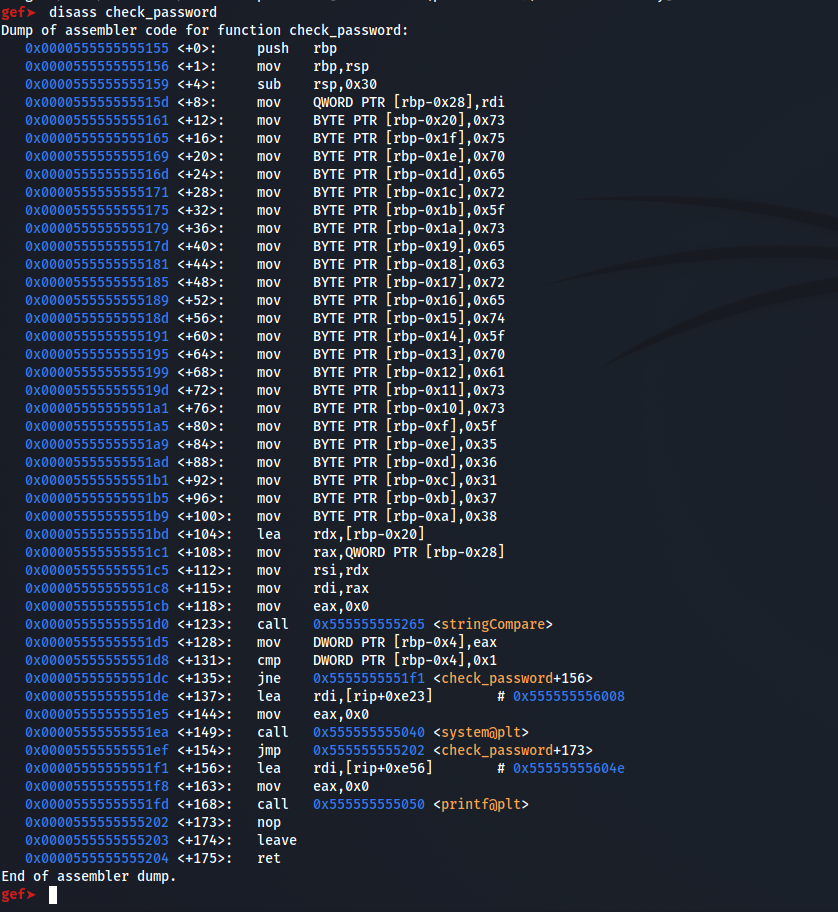
we can see that values are moved to rbp register and at address 0x00005555555551bd contents of rbp register is moved to rdx register. So viewing the string inside the rdx register will give us the flag.
So set a break point to the check_password function and and run with random argument and analyze the stack.
At address “0x5555555551bd” flag will be in the stack or u can view the content of rdx register at the same address.
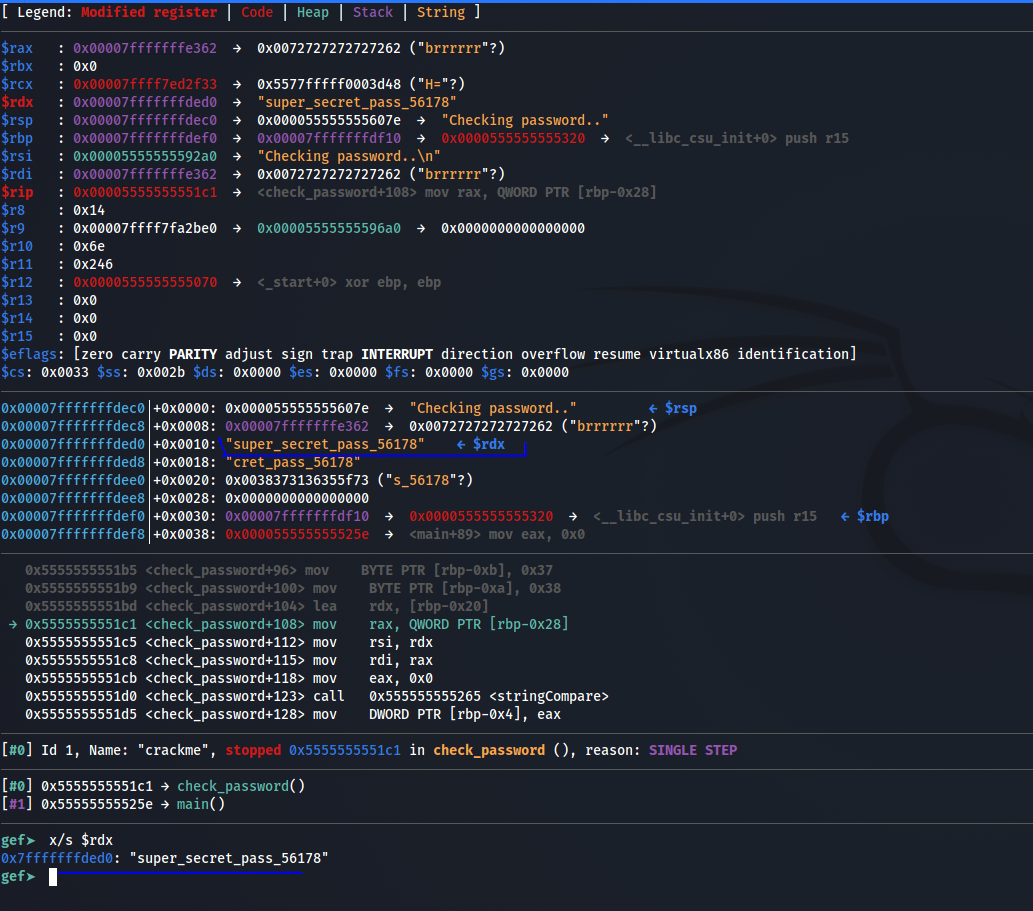
So we have got the Flag :D
